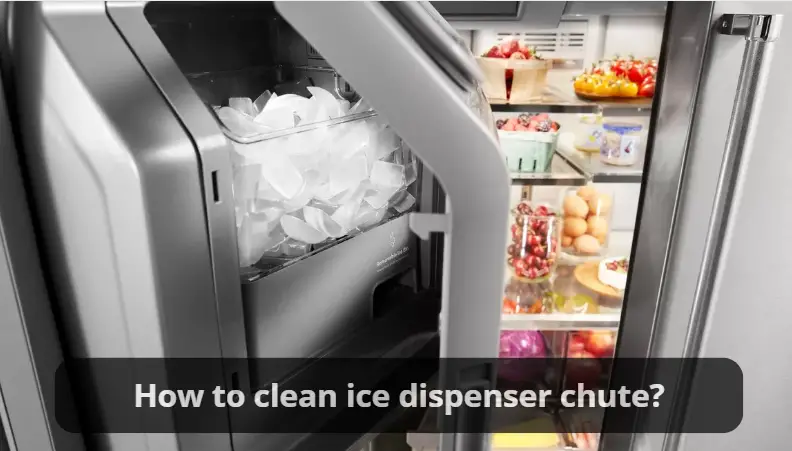
Posted on Leave a comment

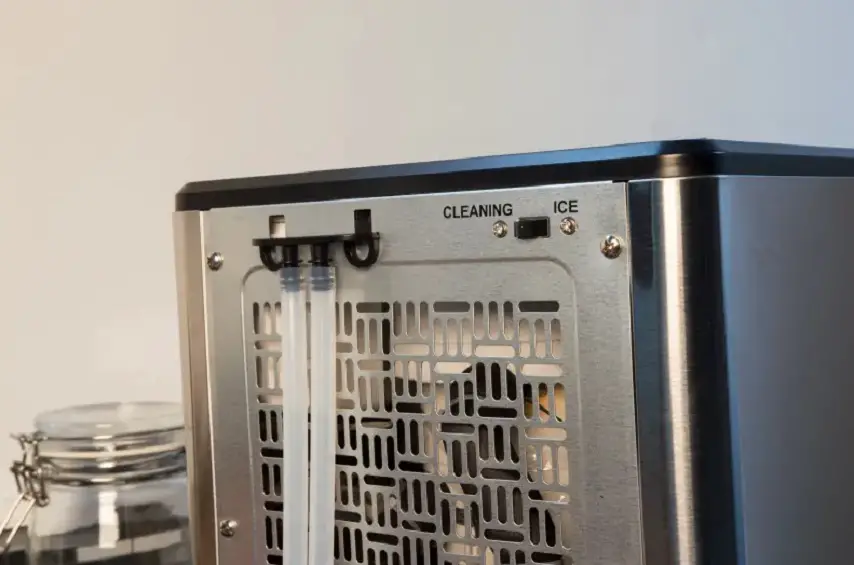
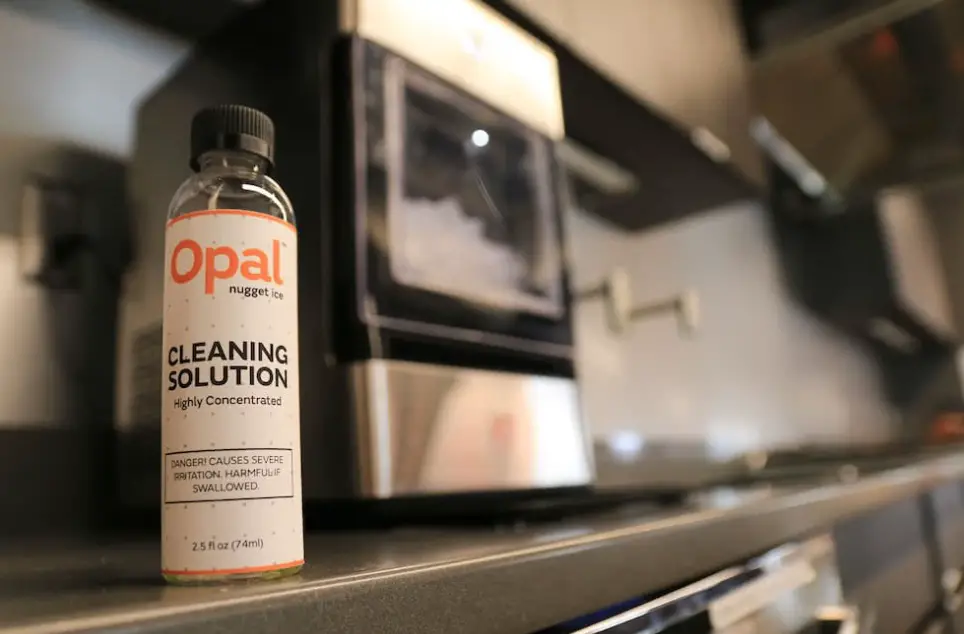
Is mold in ice machine dangerous?

Is mold in ice machine dangerous?

Is mold in ice machine dangerous?

Yes, mold in an ice machine is dangerous. Mold can contaminate the ice, which can lead to health risks for anyone consuming it. Here are some key concerns:

  1. Health Hazards: Mold exposure can cause allergic reactions, respiratory issues, and other health problems, especially in individuals with weakened immune systems or mold sensitivities.
  2. Contaminated Ice: Ice from a moldy machine can carry bacteria, mold spores, and other pathogens, potentially leading to foodborne illnesses when ingested.
  3. Machine Damage: Mold growth can damage the ice machine, affecting its performance and longevity.
is mold in ice machine dangerous
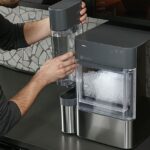
Image source: VEVOR’s

Reasons for the appearance of mold in ice machines

Mold in ice machines is unfortunately a common problem, and it’s not just an aesthetic issue. It can pose a health risk if ingested. Here are the most common reasons for mold growth in ice machines:

Moisture and Warmth:

  • Water Leaks: Leaks in the water lines, ice bin, or even the machine’s exterior can create puddles of water that provide the perfect environment for mold to thrive.
  • Poor Drainage: If the drain line for the machine is clogged or blocked, water can back up and create a stagnant pool in the machine’s base, promoting mold growth.
  • Warm Temperatures: Ice machines need to operate at cool temperatures. If the machine isn’t properly maintained or is in an area that gets too warm, mold can flourish.

Poor Hygiene and Cleaning:

  • Insufficient Cleaning: Regular cleaning of the ice machine is crucial. The machine’s components, including the ice bin, water lines, and drain line, need to be cleaned and sanitized frequently to prevent mold from taking hold.
  • Insufficient Cleaning Agents: Using the wrong or insufficient cleaning agents can leave behind residues that mold can feed on.
  • Dirty Water Source: If the water source supplying the ice machine is contaminated with bacteria or mold spores, the ice will be contaminated as well.

Material Issues:

  • Old, Worn Parts: Worn-out gaskets, seals, or water lines can create leaks and provide pathways for mold growth.
  • Inappropriate Materials: Some materials used in older machines may be susceptible to mold growth.

Environmental Factors:

  • High Humidity: High humidity levels in the surrounding environment can contribute to mold growth in the machine.
  • Poor Ventilation: If the ice machine is in a poorly ventilated area, moisture can build up and promote mold growth.

User Habits:

  • Leaving Ice Out: Leaving the ice machine door open for extended periods can allow moisture to enter and contribute to mold growth.
  • Using Contaminated Scoops: Using dirty or contaminated scoops to remove ice can introduce mold spores into the machine.
is mold in ice machine dangerous
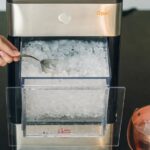
Image source: Drain-Net

Mold removal products in ice machine

Commercial Ice Machine Cleaners:

Types: These are specifically formulated for ice machines and typically come in liquid or tablet form. They contain powerful cleaning agents and sanitizers to kill mold and bacteria.

Examples:

  • P&G ProClean Ice Machine Cleaner: A popular choice, known for its effectiveness in removing mold, algae, and mineral deposits.
  • Clorox Ice Machine Cleaner and Sanitizer: A bleach-based cleaner, effective in killing a wide range of bacteria and mold.
  • Zep Ice Machine Cleaner and Sanitizer: A concentrated cleaner that can be diluted for various cleaning needs.

Considerations:

  • Follow Instructions Carefully: Always read and follow the manufacturer’s instructions for dilution, application, and dwell time.
  • Rinse Thoroughly: Rinse the ice machine thoroughly with clean water after using any cleaner to ensure no residues remain.
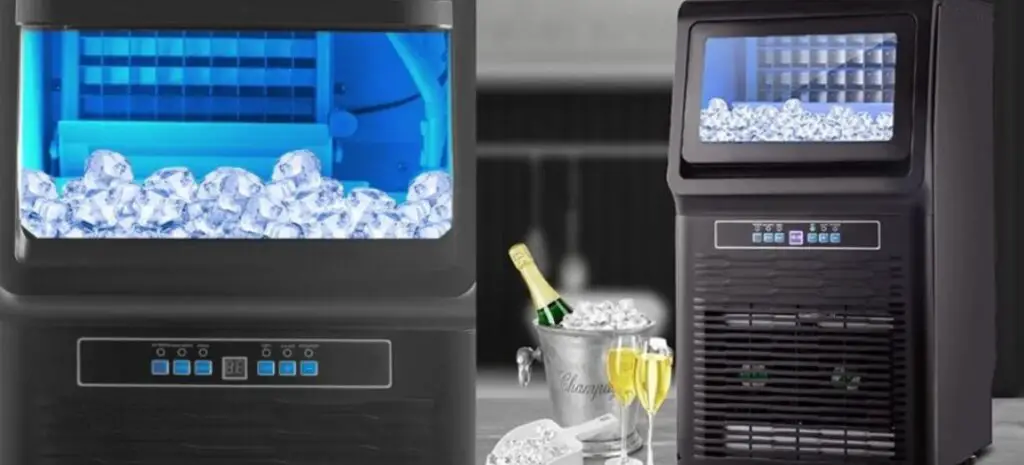
Image source: Nature’s Freedom

Bleach Solutions:

Effectiveness: Bleach is a strong disinfectant and can be effective in killing mold.

Dilution: Always dilute bleach with water according to the manufacturer’s instructions. A common ratio is 1:10 (1 part bleach to 10 parts water).

Considerations:

  • Limited Effectiveness: Bleach may not remove all mold and may require multiple applications.
  • Corrosion Risk: Bleach can corrode some metal parts in the ice machine, so it’s essential to use it cautiously and rinse thoroughly.

Vinegar Solutions:

Effectiveness: Vinegar is a natural disinfectant and cleaner. While it may not kill mold as effectively as bleach or commercial cleaners, it can help remove mold spores and prevent regrowth.

-Dilution: Use a solution of equal parts vinegar and water.

-Considerations:

  • Less Powerful: Vinegar is a less powerful disinfectant than bleach or commercial cleaners.
  • Odor: Vinegar can leave a lingering odor, so make sure to rinse the machine thoroughly.

Baking Soda:

-Effectiveness: Baking soda is a mild abrasive that can help remove mold and loosen debris.

Application: Make a paste with baking soda and water and apply it to the moldy areas. Let it sit for a few minutes before scrubbing with a soft brush.

Considerations:

  • Gentle Approach: Baking soda is a gentle cleaner, so it may not be effective for heavily mold-infested areas.
  • Rinse Thoroughly: Rinse the machine thoroughly with clean water after using baking soda to remove any residue.

Professional Cleaning:

  • For Severe Mold: If the mold infestation is severe or you’re unsure about using cleaning products, consider contacting a professional cleaning service specializing in ice machine sanitation.
  • Safety and Expertise: Professional cleaners have the expertise, equipment, and safety measures to effectively clean and sanitize your ice machine without causing damage.

Important Reminders:

  • Safety First: Always wear protective gloves and eyewear when cleaning your ice machine with cleaning products.
  • Thorough Rinsing: Rinse the ice machine thoroughly with clean water after using any cleaning product to remove any residue.
  • Preventative Measures: Once you’ve removed mold, take steps to prevent its return, such as regularly cleaning the machine and maintaining a clean water source.
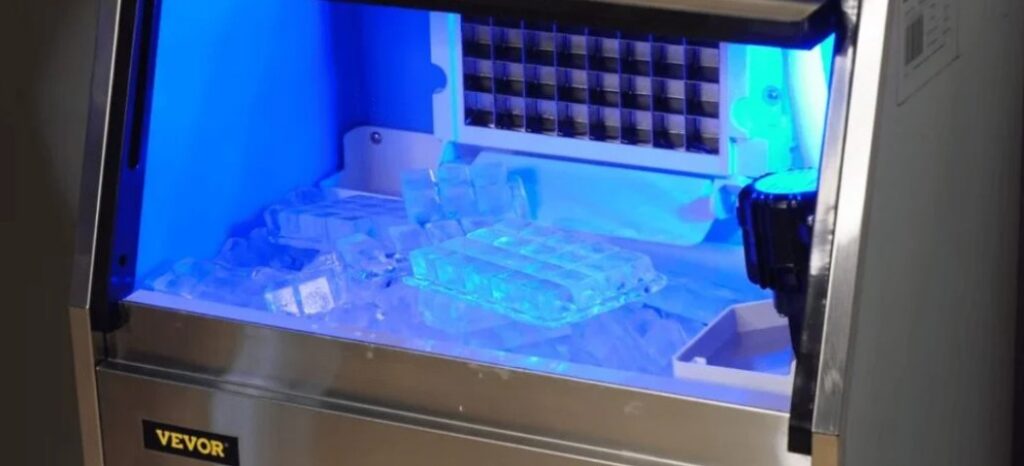
Image source: Mashed

READ ALSO: Why is my ice maker so slow?

FAQs

What type of mold grows in ice machines?

Moisture: Ice machines provide a constant source of moisture due to the condensation and water used for ice production.
Warmth: While the ice itself is cold, the surrounding environment can be warmer, especially if the machine isn’t properly maintained or in a hot area.
Nutrients: Mold can feed on water deposits, mineral build-up, and even traces of organic material left behind from cleaning products or food.

Specific Mold Species:
Aspergillus: This common mold genus can produce toxins that can be harmful if inhaled or ingested. Some species are known to cause respiratory problems and allergic reactions.
Penicillium: This genus is known for producing penicillin, an antibiotic. However, some species can cause allergic reactions and respiratory problems, particularly in people with compromised immune systems.

Other Types of Mold:
While Aspergillus and Penicillium are most common, other types of mold can also grow in ice machines, depending on environmental factors. These may include:

Cladosporium: This type of mold is often found in damp environments and can cause allergies and respiratory problems.
Alternaria: Another common mold found in humid areas, Alternaria can cause allergies, asthma, and respiratory problems.

How to avoid mold in ice machine?

Regular Cleaning and Sanitization:

Frequency: Clean your ice machine at least once a week, or more often if you use it heavily.
Use the Right Products: Use a commercial ice machine cleaner and sanitizer specifically designed for this purpose. Follow the manufacturer’s instructions carefully.
Clean Thoroughly: Clean all parts, including the ice bin, water lines, drain line, and the machine’s exterior.
Focus on Hard-to-Reach Areas: Don’t forget to clean around seals, gaskets, and other areas where moisture can collect.

Posted on Leave a comment

Antarctic star ice maker troubleshooting

antarctic star ice maker troubleshooting

Antarctic star ice maker troubleshooting

Introduction

The Antarctic Star ice maker is a cutting-edge appliance designed to generate a substantial amount of clear, restaurant-quality ice quickly. Capable of producing up to 26 pounds of ice within a 24-hour period, this device is ideal for both home and commercial settings. However, like any advanced appliance, it can occasionally face issues that require troubleshooting. This guide aims to provide detailed instructions to help you maintain and resolve common issues with your Antarctic Star ice maker, ensuring its optimal performance for years to come.

Common Issues and Solutions

Ice Maker Not Dropping Ice

When your ice maker stops dropping ice, it can be due to several reasons. Here’s how to sort this out.

Inspect Chute

One of the simplest issues could be a blocked chute. Sometimes, ice builds up in the chute and prevents new ice from dropping. Check the chute for any blockages and clear them out with a plastic utensil to avoid damage to the components.

Example: If you notice ice chunks obstructing the chute, gently remove them using a plastic spatula or a similar tool.

Power Status

Powering the unit might seem obvious, but it’s essential to ensure that your ice maker is indeed turned on. Double-check the power switch or button to confirm it’s in the “on” position. Also, make sure the power cord is securely plugged into a functional outlet.

Example: Check if the display panel lights up when the unit is turned on. If not, inspect the power cord for any signs of damage and ensure it’s properly plugged into an operational outlet by testing with another device.

Thermostat Inspection

It’s important to make sure the thermostat is set correctly. An incorrect setting can prevent ice production. Refer to your user manual for the ideal temperature setting for your model.

Example: If your ice maker isn’t producing ice, check the internal temperature setting. It should generally be set around 0°F (-18°C) for optimal ice production.

Image source: Tiendamia

Ice Maker Not Producing Ice

If your Antarctic Star ice maker isn’t producing ice at all, there are a few potential culprits to investigate.

Water Supply Line

A common issue is a problem with the water supply line. Ensure it is clear and securely connected. A blocked or disconnected water supply line can completely halt ice production.

Example: Inspect the water line connected to the back of the ice maker. If it’s kinked or blocked by debris, straighten it out and clean any obstruction.

Water Valve

The water valve needs to function correctly for the ice maker to receive water. If it’s faulty, the valve may need to be checked and possibly replaced following the manufacturer’s guidelines.

Example: Listen for a clicking sound when the ice maker tries to fill the tray with water. If you don’t hear it, the valve might be faulty and need replacement.

Power Supply

Sometimes, the appliance isn’t receiving adequate power. Check the power cord for any visible damage and ensure all electrical connections are secure. Ensure that the ice maker is properly plugged in, and that the outlet is functioning.

Example: Use a multimeter to check the voltage at the wall outlet. It should typically read around 120 volts for proper operation.

Resetting the Ice Maker

Often, a simple reset can solve the issue. Turn the ice maker off, wait a few minutes, and then turn it back on. This can help recalibrate the system and resolve minor glitches.

Example: If your ice maker has a reset button, press and hold it for a few seconds to reset the system. Refer to the user manual for specific instructions on resetting your model.

Excessive Noise

If your Antarctic Star ice maker is making excessive noise, it usually indicates mechanical issues.

Airflow

Ensure that there’s adequate space around the unit for ventilation. Obstructions to airflow can cause the compressor to work harder, generating more noise. Make sure there’s at least 3 inches of clearance around the ice maker.

Example: Position the ice maker at least 3 inches away from walls or other appliances. Clear away any objects that might be blocking the ventilation grilles.

Internal Components

Loose or damaged parts can cause noise. Inspect the internal components, and if you find any loose screws or parts, tighten them. If any parts appear damaged, they might need to be replaced.

Example: If you hear rattling noises, check inside the cabinet for any loose screws or components. Tighten or replace them as necessary to stop the noise.

Image source: www.pinterest.jp

Unpleasant Odors

Unpleasant odors from the ice maker can be unpleasant and can even indicate mold or bacteria growth. Here’s how to address it:

Cleaning the Interior

Use a solution of bleach and water to clean the inside of the unit thoroughly. This will help eliminate any bacteria or mold that might be causing the smell.

Example: Mix one tablespoon of bleach with a gallon of water. Using a clean cloth, wipe down all interior surfaces, then rinse with clear water and dry thoroughly.

Replacing the Filter

Change the water filter regularly as recommended by the manufacturer to prevent bacteria growth. A dirty filter can not only cause odors but also affect the taste of the ice.

Example: If your ice starts to taste funny or the production slows down, it’s time to replace the filter. Follow the manufacturer’s instructions for filter replacement.

Water Supply

Ensure that the water supply to the ice maker is clean and free from debris. Using filtered water can help maintain a clean system and produce better-tasting ice.

Example: Install a high-quality water filter on your main water line to ensure only clean, filtered water enters your ice maker.

Frost Build-Up

Frost build-up can significantly affect the performance of your ice maker. Here’s how to prevent and address it:

Air Circulation

Ensure there’s proper air circulation around your ice maker by maintaining at least 3 inches of clearance on all sides. Proper airflow helps prevent frost accumulation.

Example: Regularly check that vents and grilles are not blocked by dust or nearby objects.

Condenser Coils

Dust and debris on the condenser coils can impede airflow and lead to frost build-up. Clean the coils using compressed air or a vacuum to keep them free from dust and debris.

Example: Use a vacuum with a brush attachment to clean the coils behind the unit every few months to maintain optimal airflow.

Descaling the Unit

Mineral buildup inside the ice maker can also lead to frost issues. Regularly descale the unit using a descaling solution as per the manufacturer’s instructions.

Example: Use a commercially available descaling solution, following the instructions on the label for usage frequency and method.

Seals and Drains

Inspect the door seals and drains for any signs of damage or blockage. Broken seals or clogged drains can contribute to frost build-up. Replace or repair these components as necessary.

Example: Run a thin wire through the drainage tube to remove any blockages, and check the door seals for gaps or damage that allow warm air inside.

antarctic star ice maker troubleshooting
Image source: antarctic-star

Cleaning and Maintenance

Regular maintenance is crucial for the efficient operation of your Antarctic Star ice maker.

Interior Cleaning

Maintaining a clean interior ensures the production of high-quality ice and prevents bacterial growth.

Monthly Cleaning Routine

Wipe down the interior with warm water and a mild detergent every month. This prevents any bacterial build-up and ensures that the ice produced is clean and safe for consumption.

Example: Create a solution of warm water and mild dish soap. Using a clean cloth, wipe all interior surfaces, then rinse with water and dry thoroughly.

Changing the Water Filter

Change the water filter every six months or as per the manufacturer’s guidelines. This helps maintain optimal water flow and ice quality.

Example: Mark your calendar to remind you to replace the filter every six months. Follow the manufacturer’s steps for removing the old filter and installing the new one.

Advanced Troubleshooting Solutions

For those who have attempted the basic solutions and still face issues, this section provides advanced troubleshooting techniques that may require more technical know-how or professional intervention.

Electrical Issues and Diagnosis

Electrical problems can cause your Antarctic Star ice maker to malfunction. Here’s how to diagnose and address these issues:

Verifying Power Supply

Ensure the ice maker is plugged into a working electrical outlet. Use a multimeter to check if the outlet is providing power.

Example: If the multimeter reads no voltage, there might be an issue with your home’s electrical system rather than the ice maker itself.

Inspecting Wiring

Inspect the power cord and internal wiring for any visible damage. Damaged wiring can prevent the ice maker from functioning properly.

Example: Look for frayed wires or burnt marks on the cords. If found, replace the damaged wires or seek professional repair.

Image source:
FactoryPure

Mechanical Problems

Mechanical issues can also hinder the performance of your ice maker. Here’s how to diagnose and address common mechanical problems:

Ice Tray Inspection

If the ice tray is damaged or not positioned correctly, it can affect ice production. Ensure it’s in place and not obstructed.

Example: Remove the ice tray and check for any cracks or obstructions. If found, replace the tray to restore proper ice production.

Ice Ejector Arm

The ejector arm can sometimes become stuck or disconnected, preventing ice from being dispensed properly. Inspect and adjust it as necessary.

Example: Manually move the ejector arm to ensure it’s not sticking. If it doesn’t move smoothly, clean and lubricate it or replace it if damaged.

Emergency Repairs

Unexpected problems can arise despite best efforts. Here’s how to handle emergency repairs:

Finding a Trusted Technician

Build a relationship with a trusted repair service. Ensure they are certified to work on Antarctic Star appliances.

Example: Research and select a local repair service with positive reviews and certifications. Keep their contact information handy for emergencies.

Understanding Warranty Terms

Familiarize yourself with the warranty terms for your ice maker. Knowing what’s covered can save significant costs when repairs are needed.

Example: Review your warranty documentation and note any coverage for parts and labor. This ensures you know what’s covered during a repair visit.

Conclusion

The Antarctic Star ice maker, with its advanced features and robust performance, is a valuable addition to any home or office. Ensuring its longevity and optimal functionality requires regular maintenance, timely troubleshooting, and professional care when necessary. By adhering to the comprehensive guidelines provided in this article, users can address common issues effectively and maintain the high performance of their Antarctic Star ice maker. In scenarios that demand technical expertise, don’t hesitate to contact a professional to ensure that the appliance continues to serve efficiently and safely.

READ ALSO: Euhomy Ice Maker Troubleshooting | Fix Euhomy Ice Maker Not Making Ice

FAQs

Why is my Antarctic Star ice maker not dropping ice?

This can occur due to a blocked chute. Clear any obstructions and ensure the control arm is in the correct position.

What do I do if my Antarctic Star ice maker isn’t producing enough ice?

Check if the water supply line is connected properly and ensure the water filter isn’t clogged. Sometimes, simply resetting the ice maker can help.

How can I fix a leaking Antarctic Star ice maker?

Ensure all water connections are tight and check the water hose for any damage. A loose connection is often the cause of leaks.

Why does my ice taste funny from my Antarctic Star Ice Maker?

Replace the water filter and clean the interior of the ice maker thoroughly. Using filtered water also helps improve the taste of the ice.

Posted on Leave a comment

Why is my ice maker so slow?

Why is my ice maker so slow?

Why is my ice maker so slow?

During the hot summer months, nothing beats a cold drink with lots of ice. But what happens when your ice maker starts dragging its feet? Don’t worry; we’re here to help you troubleshoot and optimize your ice maker’s performance.

Understanding the Basics: How Ice Makers Work

The Ice Making Process

Ice makers might seem like magic, but they rely on a straightforward process. Once connected to a water supply, the ice maker fills its mold with water. It then freezes the water, warms the mold slightly to release the ice, and drops the ice cubes into the storage bin, ready for your next iced beverage.

why is my ice maker so slow

Key Components

An ice maker consists of several critical components: the water inlet valve, the ice mold, the filling tube, and the motor. If any of these parts aren’t working correctly, it could slow down the whole process. Knowing these basics helps in pinpointing where things might be going wrong.

Common Reasons for Slow Ice Production

Ice Bucket Placement

  • Ensuring Correct Installation

One often overlooked cause of slow ice production is the improper installation of the ice bucket. If it’s not seated properly, the ice maker may not function well. Always consult your ice maker’s manual to ensure everything is in its correct place. A poorly installed ice bucket can block the ice maker’s sensors, leading to slow or no ice production.

  • Regular Manual Checks

Even with perfect installation, it pays to check the ice bucket regularly. It can get slightly misplaced during use, particularly if you’re grabbing cubes in a hurry. Regularly repositioning it can keep things running smoothly.

why is my frigidaire ice maker so slow

Water Pressure Issues

  • Identifying Low Water Pressure

Insufficient water pressure can be a significant factor in slow ice production. If you notice your ice cubes are coming out smaller or more hollow than usual, low water pressure might be the culprit. Ensure your ice maker is connected to a cold water supply, and the shutoff valve is fully open. Use a pressure gauge to check if the water pressure meets the manufacturer’s recommendations.

  • Addressing Water Line Issues

A kinked or pinched water line can restrict water flow, leading to slow ice production. Inspect your water line carefully, ensuring it’s straight and free from obstructions.

  • Preventative Measures

To avoid water line issues, don’t push your refrigerator too close to the wall. Giving it some breathing room can prevent the line from bending or pinching, maintaining a steady flow of water to your ice maker.

why is my ge ice maker so slow

Freezer Temperature Settings

  • Ideal Temperature Settings

An essential aspect of efficient ice production is the freezer’s temperature. For your ice maker to work optimally, set your freezer between 0 and 5 degrees Fahrenheit. If the temperature is too high, the water won’t freeze quickly, slowing down ice production.

  • Monitoring and Adjusting Temperature

Keep an eye on your freezer’s temperature with a reliable thermometer. If it’s not within the ideal range, adjust the settings. If that doesn’t help, it might be time to call in a professional to service your appliance.

Fill Tube Maintenance

  • Importance of Fill Tube Maintenance

The fill tube directs water into the ice maker, and any blockage can hinder ice production. Over time, mineral deposits or ice can clog the tube, slowing down the process.

  • Cleaning the Fill Tube

Regularly inspect and clean the fill tube. If you notice any blockages, use a mixture of warm water and vinegar to dissolve them. Ensuring a clear fill tube will keep the water flowing correctly into your ice maker.

why is my ice maker making ice so slow

Water Supply Quality

  • Checking for Filter Clogs

If your ice maker has a water filter, check it regularly. A clogged filter can reduce water flow, affecting ice production. Replace water filters every six months or as per the manufacturer’s instructions.

  • Water Quality Concerns

Poor water quality can also slow down ice production and affect the taste of the ice. Consider using filtered water for your ice maker to improve both efficiency and ice quality.

why is my lg ice maker so slow

Maintenance Routine

  • Regular Condenser Cleaning

Dusty condensers can make your ice maker work harder and less efficiently. Clean the condenser coils every 3-6 months with a soft brush or vacuum to keep your appliance running smoothly.

  • Overall Appliance Maintenance

Beyond the ice maker, maintaining your entire appliance is crucial. Ensure the doors seal correctly, check for leaks, and regularly defrost the freezer if necessary. A well-maintained appliance is key to optimal ice maker performance.

When to Call a Professional

  • Identifying Complex Issues

If you’ve tried all these troubleshooting steps and your ice maker is still slow, it might be time to escalate the issue. Complex mechanical problems or electronic faults may require professional diagnosis.

  • Contacting a Certified Technician

Seek assistance from certified appliance repair technicians. They have the expertise and tools to fix intricate problems, ensuring your ice maker gets back to peak performance quickly.

Optimizing Ice Maker For Faster Production

Upgrading Your Ice Maker

Sometimes, the issue isn’t the maintenance but the model itself. Older models of ice makers tend to be less efficient than the newer ones. Upgrading to a more modern, efficient ice maker can significantly increase ice production speed. Look for features that promote faster production and less energy consumption.

Energy-Efficient Models

Energy efficiency isn’t just good for the environment; it’s beneficial for your wallet too. Modern ice makers are designed to consume less power while producing the same, if not more, quantities of ice. Check for models with energy-efficient ratings to ensure you’re getting the best performance with the least power usage. Invest in a machine that meets both your ice needs and energy-saving goals.

Conclusion

There you have it. A slow ice maker can be a real mood killer, especially in the heat, but with a little maintenance and attention, you can keep it running smoothly. Regular checks, timely cleaning, and ensuring optimal conditions will make sure you never run out of ice again.

READ ALSO: How do you reset a portable ice maker?

FAQs

My ice maker is making strange noises. What should I do?

Strange noises could indicate issues with the motor or ice ejector assembly. Firstly, check for any blockages and ensure the ice bucket is correctly placed. If the noise persists, it might be time to contact a professional repair service.

How often should I clean my ice maker?

Cleaning your ice maker every three to six months can help maintain optimal performance. This includes cleaning the water filter, condenser coils, and ensuring the fill tube is unobstructed.

Why does my ice taste funny?

Funny-tasting ice is often due to impurities in the water. Make sure to replace your water filter regularly and consider using a water purification system.

Can I use the ice maker if the filter needs to be changed?

While you can technically use the ice maker, a dirty or clogged filter can reduce efficiency and affect ice quality. It’s best to replace the filter as recommended.


Posted on Leave a comment

How do you reset a portable ice maker?

How do you reset a portable ice maker?

How do you reset a portable ice maker?

Introduction

Having a portable ice maker can be a lifesaver for parties, camping trips, or even just everyday convenience. However, like any appliance, they can sometimes run into issues. Whether your machine has stopped making ice or encounters some other glitch, understanding how to reset a portable ice maker can get it back to working condition.

Why Would You Need to Reset Your Portable Ice Maker?

Resetting your ice maker might seem like a drastic step, but it can solve several common problems. If your machine isn’t making ice, is producing less ice than usual, or is displaying error codes, a reset can often clear these issues. Resetting essentially reboots the system, clearing out minor software glitches and restoring factory settings.

Understanding Your Portable Ice Maker’s Components

Before diving into the reset process, it’s helpful to understand the basic components of your portable ice maker:

  • Control Panel: Displays the status and allows for settings adjustment.
  • Water Reservoir: Holds the water used to make ice.
  • Ice Basket: Where the ice cubes are stored after production.
  • Evaporator Rods: Freeze the water into ice.
How do you reset a portable ice maker?

Initial Troubleshooting Steps

Before performing a full reset, consider these initial troubleshooting steps:

  1. Check the power supply and ensure the machine is plugged in.
  2. Verify that there is enough water in the reservoir.
  3. Clean any visible blockages or ice build-up.
  4. Ensure the machine is on a flat, stable surface.

How to Reset a Portable Ice Maker

If the initial troubleshooting doesn’t resolve the issue, it’s time for a reset. Here’s a general reset method applicable to most models:

  1. Turn off and unplug the machine.
  2. Wait for about 10 minutes to let the internal components cool down.
  3. Plug the machine back in and turn it on.
  4. Press and hold the reset button (if available) for a few seconds.
  5. Check if the ice maker resumes normal operation.

Resetting a Frigidaire Portable Ice Maker

  1. Turn off the ice maker.
  2. Unplug the machine from the power source.
  3. Wait for at least 10 minutes.
  4. Plug it back in and turn it on.
  5. Hold the “reset” button for 10 seconds until you hear a beep.

Resetting an Igloo Portable Ice Maker

  1. Ensure the machine is off.
  2. Disconnect from the power supply.
  3. Wait 15 minutes to clear internal faults.
  4. Connect it back to power.
  5. Press and hold the “Power” button and “Select” button simultaneously for 5 seconds.
how do you reset a frigidaire portable ice maker

Common Portable Ice Maker Issues and Solutions

Ice Maker Not Making Ice

  • Possible Causes: Lack of water, blocked water lines, or faulty thermostat.
  • Solution: Ensure the reservoir is filled with water, check for blockages, and replace the thermostat if necessary.

Ice Maker Leaking Water

  • Possible Causes: Overfilled reservoir, clogged filter, or damaged water lines.
  • Solution: Don’t overfill the water reservoir, clean or replace the filter, and inspect and repair any damaged water lines.

Ice Maker Making Noise

  • Possible Causes: Loose parts, ice blockages, or failing motor.
  • Solution: Tighten any loose components, clear any ice build-up, and consider replacing the motor.

Advanced Troubleshooting Tips

For persistent issues that a reset doesn’t solve, consider these advanced tips:

  • Ensure proper ventilation: Make sure there’s enough space around the ice maker for air circulation.
  • Inspect the condenser coils: Clean any dirt or debris from the coils.
  • Check the water inlet valve: Ensure it’s not blocked or defective.

How to Maintain a Portable Ice Maker

Regular maintenance can prevent many issues from occurring in the first place. Follow these tips to keep your ice maker in top condition:

Regular Cleaning

  • Clean the ice maker every month using a mixture of warm water and mild detergent.
  • Rinse thoroughly to ensure no soap residue remains.

Descaling the Machine

  • Use a commercial ice maker cleaner or a vinegar solution to descale the machine every 3-6 months.
  • Follow the manufacturer’s instructions for descaling.

Proper Storage

  • When not in use, drain all the water and dry the interior.
  • Store in a cool, dry place away from direct sunlight.

Conclusion

Knowing how to reset a portable ice maker can save you time and frustration. By understanding common issues and maintaining your appliance, you can enjoy consistent ice production for all your needs. Happy ice-making!

READ ALSO: How to Defrost Samsung Ice Maker?

FAQs

Why is my portable ice maker not making ice?

Ensure the machine is plugged in, has water, and is free of any blockages. Try resetting if these conditions are met.

How often should I clean my ice maker?

Ideally, you should clean your ice maker every month, and descale every 3-6 months for optimal performance.

Where can I find the reset button on my ice maker?

The location of the reset button varies by model. Refer to your user manual for specifics.

Can I use tap water in my portable ice maker?

Yes, but using filtered or distilled water can improve ice quality and reduce mineral build-up.

Posted on Leave a comment

Ice Machine Drain Line Installation

Ice Machine Drain Line Installation

Ice Machine Drain Line Installation

Introduction

Installing an ice machine drain line is a crucial step in ensuring the efficiency and hygiene of your ice machine. This comprehensive guide will walk you through the process, providing detailed instructions and tips on how to install an ice machine drain line smoothly and effectively.

Purpose of a Drain Line

The drain line ensures that excess water from the ice machine is properly removed, preventing overflow and maintaining sanitary conditions. Proper ice machine drain line installation is vital for the longevity of your machine.

Common Types of Drain Lines

There are several types of drain lines, including gravity drains, pump drains, and condensate drains. Each type has its own set of requirements and benefits, making it important to choose the right ice machine drain line system for your needs.

ice machine drain line installation

Tools and Materials Needed

Essential Tools

  • Wrench
  • Screwdriver
  • Hose clamps
  • Pipe cutter

Required Materials

  • Drain hose
  • Sealant
  • Pipe connectors

Having the right materials ensures a smooth and effective ice machine drain line setup.

Preparing for Installation

Selecting the Installation Location

Choose a location near an existing drain to minimize the distance the drain line needs to travel. Ensure the area is accessible for maintenance. This is crucial for a successful ice machine drain installation.

Safety Precautions

Turn off the ice machine and disconnect it from the power supply before starting the installation. Wear safety gloves and goggles to ensure safe installation of the ice machine drain line.

counter ice machine drain line installation

Step-by-Step Installation Guide

1. Turning Off the Water Supply

Shut off the water supply to the ice machine to prevent any leaks during the installation process. This is an important step in the ice machine drain line installation guide.

2. Connecting the Drain Hose

Attach the drain hose to the designated outlet on the ice machine. Secure it with a hose clamp to ensure a tight fit, ensuring proper ice machine drain hose installation.

3. Securing the Hose to the Machine

Use additional clamps or brackets to secure the hose along the path to the drain, preventing any sagging or kinks, crucial for maintaining an efficient ice machine drainage system.

4. Routing the Hose to the Drain

Route the hose to the nearest drain, ensuring there are no sharp bends or obstructions along the way. This step is vital for ensuring a smooth ice machine drain line flow.

5. Testing the Drain Line

Turn on the water supply and run the ice machine to check for any leaks. Ensure the water flows freely through the drain line, verifying the ice machine drain line installation is successful.

over counter ice machine drain line installation

Common Installation Mistakes and How to Avoid Them

  • Incorrect Hose Placement

Avoid placing the hose too high or too low, which can cause improper drainage. Ensure a smooth gradient from the ice machine to the drain to prevent issues in the ice machine drain line setup.

  • Insufficient Hose Length

Ensure the hose is long enough to reach the drain

Maintenance Tips for Ice Machine Drain Lines

Regular Inspection

Inspect the drain line regularly for signs of wear, leaks, or blockages. Address any issues promptly to avoid major problems and maintain an efficient ice machine drain system.

Cleaning the Drain Line

Clean the drain line periodically to prevent the buildup of debris and ensure efficient drainage. Regular cleaning is essential for the longevity of your ice machine drain line.

Troubleshooting Drain Line Issues

Clogs and Blockages

If the drain line is clogged, use a plumber’s snake or a high-pressure water jet to clear the blockage. Effective ice machine drain line troubleshooting ensures smooth operation.

Leaks and Drips

Check all connections and seals for leaks. Tighten any loose fittings and replace damaged sections of the hose to maintain a leak-free ice machine drain system.

Conclusion

Proper installation and maintenance of your ice machine drain line are essential for ensuring the longevity and efficiency of your ice machine. By following the steps outlined in this guide, you can prevent common issues and keep your ice machine running smoothly.

READ ALSO: How to clean ice dispenser chute? 5 Essential Tools

FAQs

How often should I check my drain line?

You should inspect your drain line at least once a month to ensure there are no leaks or blockages, ensuring the smooth operation of your ice machine drain system.

What materials are best for drain lines?

PVC and stainless steel are both excellent choices due to their durability and resistance to corrosion, making them ideal for ice machine drain lines.

Can I install the drain line myself?

Yes, with the right tools and instructions, you can install the drain line yourself. However, if you are unsure, it’s best to consult a professional for proper ice machine drain line installation.

What should I do if my drain line is clogged?

Use a plumber’s snake or high-pressure water jet to clear the blockage. Regular maintenance can help prevent clogs in your ice machine drain line.

Posted on Leave a comment

Hoshizaki Ice Machine Beeping: Understanding and Resolving the Issue

hoshizaki ice machine beeping

Hoshizaki Ice Machine Beeping

Introduction

Ice machines are a crucial component in many businesses, especially in the food and beverage industry. A Hoshizaki ice machine is renowned for its reliability and efficiency. However, like any appliance, it can occasionally run into issues, one of which is beeping. If your Hoshizaki ice machine is beeping, it is essential to understand the potential causes and solutions.

What is Hoshizaki Ice Machine?

Hoshizaki is a well-known manufacturer of commercial ice machines, recognized for their reliability, efficiency, and high-quality ice production. Their ice machines are used in a variety of settings, including restaurants, bars, hotels, and hospitals. Here are some key points about Hoshizaki ice machines:

Types of Hoshizaki Ice Machines:

  1. Modular Ice Machines: These are designed to sit on top of an ice bin, beverage dispenser, or soda fountain. They come in different sizes to meet varying ice production needs.
  2. Self-Contained Ice Machines: These units combine both the ice-making mechanism and the ice storage bin into a single unit, suitable for smaller spaces.
  3. Undercounter Ice Machines: These are compact and designed to fit under countertops, making them ideal for bars and small cafes.

Ice Types Produced:

  1. Crescent Ice: Known for its slow melt rate, it’s ideal for beverages.
  2. Cube Ice: Available in different sizes (small, medium, large) and used in a variety of applications.
  3. Flake Ice: Soft and moldable, perfect for food displays and medical uses.
  4. Nugget Ice: Chewable and ideal for soft drinks and blended beverages.

Features and Benefits:

  • Durability: Hoshizaki machines are built with high-quality materials, ensuring a long lifespan.
  • Efficiency: They are designed to be energy and water-efficient, reducing operational costs.
  • Ease of Maintenance: Many models feature self-cleaning functions and easy-to-access parts for simpler maintenance.
  • Consistency: Known for producing ice of consistent size and quality.

Common Models:

  • KM Series: Known for crescent ice production and high efficiency.
  • KM Edge Series: Enhanced models with improved performance and energy efficiency.
  • AM Series: Offers various cube sizes.
  • D Series: Includes dispensers that are ideal for hotels and hospitals.

Considerations When Choosing a Hoshizaki Ice Machine:

  • Capacity: Determine the ice production capacity needed based on peak demand.
  • Space: Assess the space available for installation to choose the right type and size.
  • Ice Type: Select the type of ice that best suits your business needs.
  • Maintenance: Consider the ease of maintenance and availability of service in your area.
hoshizaki ice machine beeping
Image source: YouTube

Common Causes of Beeping

Low Water Supply

One of the most common reasons for a beeping Hoshizaki ice machine is a low water supply. This can occur if the water line is disconnected, the water valve is closed, or there is a blockage in the line.

High Temperature

Another common cause is an excessively high temperature within the machine. This can be due to poor ventilation, high ambient temperatures, or a malfunctioning cooling system.

Blocked Water Filter

A clogged or dirty water filter can restrict water flow, leading to various operational issues, including the beeping alarm.

Cooling System Maintenance

Check fans and condensers. If they are dirty, they can cause overheating and trigger the alarm. Cleaning these components will improve the unit’s performance.

hoshizaki ice machine 3 beeps
Image source: YouTube

READ LSO: What does it mean when a Hoshizaki ice machine is beeping?

Troubleshooting Steps

Checking Water Supply

Ensure the water supply is adequate. Check that the water line is connected properly, the valve is open, and there are no obstructions.

Inspecting Temperature Levels

Verify the temperature around the ice machine. Ensure it is well-ventilated and the ambient temperature is within the recommended range. Inspect the cooling system for any issues.

Cleaning the Water Filter

Regularly clean the water filter to prevent blockages. A clean filter ensures proper water flow and can prevent many operational issues.

READ ALSO: How to Clean GE Profile Ice Maker: A Step-by-Step Guide

Regular Maintenance Tips

Regular Cleaning Schedule

Implement a regular cleaning schedule for your ice machine. Clean both the interior and exterior parts to maintain efficiency.

Filter Replacement

Replace the water filter as recommended by the manufacturer. This ensures clean water flow and reduces the risk of clogging.

Professional Inspection

Schedule regular professional inspections to identify and resolve potential issues before they escalate.

Conclusion

Understanding why your Hoshizaki ice machine is beeping and knowing how to troubleshoot can save you time and prevent further damage. Regular maintenance and timely professional help are key to ensuring the longevity and efficiency of your machine.

FAQs

How Often Should I Clean My Ice Machine?

Clean your ice machine at least once a month to ensure optimal performance.

What Type of Water Filter Should I Use?

Use a water filter recommended by Hoshizaki for the best results.

What If the Beeping Persists?

If the beeping persists, contact a professional technician to diagnose and fix the issue.

Can I Use Any Cleaner for the Machine?

Use cleaners specifically designed for ice machines to avoid damage and ensure safety.

How Often Should Filters Be Replaced?

Filters should be replaced every 3-6 months depending on usage intensity and water quality.

Can You Use the Ice Machine Without a Filter?

Using the machine without a filter can lead to lower ice quality and more frequent breakdowns, so it’s always recommended to install a filter.

Posted on Leave a comment

How to clean ice dispenser chute? 5 Essential Tools

How to clean ice dispenser chute?

How to clean ice dispenser chute?

A clean and sanitary refrigerator ice and water dispenser not only ensures the quality of your ice and water but also contributes to the overall health and safety of your household. Regular cleaning is essential to prevent the buildup of bacteria, mold, and dirt. In this comprehensive guide, we will provide you with expert advice on how to effectively clean and maintain your refrigerator ice and water dispenser, surpassing other sources in terms of both depth and accuracy.

Before delving into the cleaning process, it’s crucial to understand the various ways in which an icemaker can become dirty. By recognizing the potential sources of contamination, you can take effective measures to prevent mold growth and ensure the overall cleanliness of your ice dispenser.

How to clean ice dispenser chute?

Causes of icemaker contamination

  1. Dirty hands touching the ice and the inside and outside of the icemaker: Human contact with the icemaker can introduce bacteria and germs, leading to mold growth.
  2. Infrequent water changes: Failure to regularly change the water in your icemaker can result in stagnant water, which promotes the growth of mold and bacteria.
  3. Neglecting to remove older ice: Allowing old ice to accumulate can create an environment conducive to mold development.
  4. Neglecting to clean the insides of the machine: Over time, the inside of the icemaker can accumulate residue and mold, necessitating regular cleaning.
  5. Dirty water freezing and becoming contaminated ice: If your water supply contains impurities or bacteria, freezing it can preserve these contaminants in the form of ice.
  6. Dust buildup: Leaving your icemaker open can lead to dust accumulation, which can carry bacteria and contribute to mold growth.
how to clean ice dispenser chute on whirlpool refrigerator

Essential Tools for Cleaning Your Icemaker

To tackle icemaker cleaning effectively, you’ll need a few key tools and cleaning solutions. Here’s a list of the items we recommend:

  1. EC3 Ready-to-Use Mold Spray: This is a safe and effective mold-cleaning solution specifically designed for icemaker applications. It is non-toxic and won’t leave harmful residue behind.
  2. 3% Hydrogen Peroxide: Ordinary hydrogen peroxide, readily available at drugstores, is suitable for cleaning purposes.
  3. Paper Towels: These will be used to wipe and clean various surfaces.
  4. Pure Castile Soap or Dish Soap: We recommend using Dr. Bronner’s Pure Castile Soap or a standard dish soap for cleaning the ice tray.
  5. Q-tips: These are useful for reaching tight spots and areas that require precise cleaning.

Cleaning Process: Step-by-Step Instructions

Now that we have a clear understanding of the risks associated with mold in icemakers and the essential tools required, let’s discuss the step-by-step process for cleaning your refrigerator ice dispenser:

Step 1: Prepare the Environment

Begin by opening your refrigerator or freezer, depending on the location of your ice maker. Make sure to turn off the icemaker to prevent the production of new ice during the cleaning process. This will allow you to focus solely on removing parts and cleaning without interruptions. Proceed to unlatch or release the part of the machine that houses the ice. Remove the tray of ice and dump its contents into the sink for later disposal.

Step 2: Clean the Ice Tray

While at the kitchen sink, use warm water along with either pure Castile soap or dish soap to thoroughly clean the inside and outside of the ice tray. Ensure that all surfaces are carefully scrubbed and rinsed. Once cleaned, spray the inside and outside of the ice tray with the EC3 mold spray, and place it on a clean dish towel to air dry.

Step 3: Clean the Inside and Outside of the Icemaker

Now, focus on the area inside your refrigerator or freezer where the ice slides through to the outside. Using the EC3 spray and a paper towel, thoroughly spray and wipe the inside and outside of this area until clean. The EC3 spray is completely natural and harmless, so there’s no need to worry about any residue affecting the quality or safety of your ice cubes. Furthermore, the spray not only cleans existing bacteria and mold but also prevents future growth.

Step 4: Tackle the Exterior of the Icemaker

Cleaning the outside of your icemaker may require some mechanical knowledge, as different ice dispenser models have varying designs. If your icemaker has a clear plastic overlay, it should be cleaned to remove any existing mold. Begin by opening the “trap door” from where the ice is dispensed. If the overlay is removable, take it off to facilitate cleaning. For non-removable overlays, thoroughly spray the entire surface with the EC3 spray and wipe it clean using paper towels.

To address visible mold or mildew, dip a Q-tip into hydrogen peroxide and apply it directly to the affected areas. This peroxide treatment will kill the mold and have a bleaching effect. For detachable overlays, rinse them under warm water. If your overlay cannot be detached, use warm water-soaked paper towels to wipe away any remaining peroxide residue. Following this, spray the overlay with EC3 once again and wipe it down with a fresh paper towel. Finally, reattach the piece to your refrigerator or freezer, if it was removed during cleaning.

Step 5: Address Additional Components

To ensure a thorough cleaning, extend your efforts to other components connected to the ice dispenser. Use a Q-tip sprayed with EC3 and dipped in peroxide to reach inside the water dispenser hole, as this area is prone to harboring mold and mildew. For effective rinsing, run another Q-tip under warm water and use it to remove any excess EC3 and peroxide residue by rubbing inside the water dispenser hole a few times. You can repeat this rinsing process until you’re satisfied that all residues have been eliminated.

Additionally, remove the catch tray under your ice/water dispenser and wash it in warm water with either Castile soap. Spray it with the EC3 solution, and wipe it clean using paper towels.

Step 6: Finalizing the Cleaning Process

To complete the cleaning process, use a Q-tip soaked in EC3 and peroxide to clean the water dispenser spout thoroughly. This is an essential area that often hides mold and mildew, making it crucial to address it for maximum cleanliness. Once all the previous steps have been accomplished, your icemaker should be free from mold, and its external appearance should be clean and fresh. With the ice tray completely dry, reinsert it inside the icemaker and turn it back on, allowing it to produce fresh, clean ice.

how to clean ice dispenser chute samsung

Regular Maintenance for a Safe Environment

To ensure the ongoing safety and health of your household, I recommend repeating this cleaning process a few times a year. Regular maintenance will effectively control mold growth and keep you and your family safe. With your icemaker thoroughly cleaned and free from contamination, you can confidently enjoy refreshing drinks without worrying about potential health risks.

how to clean whirlpool ice dispenser chute

READ ALSO: How to Defrost Samsung Ice Maker?

Conclusion

In conclusion, understanding the significance of a clean icemaker and the potential health risks associated with mold and bacteria accumulation is essential. By following the detailed steps and utilizing the recommended tools and cleaning solutions provided, you can achieve optimal cleanliness and guarantee the safety of your icemaker. Remember, regular maintenance and periodic cleaning are crucial to promoting a mold-free environment in your refrigerator. So sit back, relax, and enjoy your refreshing drinks with clean, fresh ice that you can trust!

FAQ’s

How often should ice makers be cleaned?

To ensure optimal functioning and maintain clean ice, cleaning your ice maker every 3-6 months is recommended.

What happens if you don’t clean your ice machine?

Neglecting to clean your ice machine can lead to an accumulation of buildup, resulting in unpleasant tastes, smells, and even the growth of bacteria or mold in extreme cases.

Can I run vinegar through my ice maker?

Absolutely! Vinegar is a natural cleaning agent that is safe to use in your ice maker. It effectively removes deposits and eliminates buildup.

How do you disinfect an ice maker in a refrigerator?

By running a mixture of vinegar and warm water through the ice maker, you can effectively disinfect it. Remember to discard the first few batches of ice after cleaning to ensure no residue remains.

Posted on Leave a comment

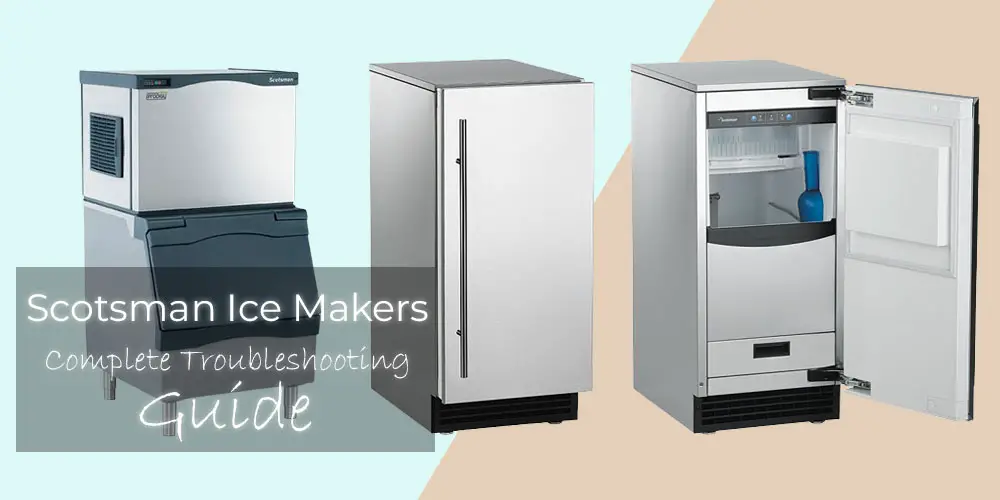
Scotsman Ice Maker Troubleshooting | Complete Guide

scotsman ice maker troubleshooting

When it comes to ice makers, the Scotsman is one of the most trusted brands globally and for a good reason. These machines are built to last and keep your business running smoothly for years. But even the best appliances break down sometimes.

If you have one of their machines and it stops working, don’t panic! You’re not alone, and There’s usually an easy fix. Thousands of Scotsman ice makers have been installed in homes worldwide, and many of those homeowners have experienced problems with their machines.

To help you get through this process as smoothly as possible, we have this guide to help you troubleshoot common issues with your Scotsman Ice Maker to get it up and running again in no time.

Scotsman Ice Maker Troubleshooting Questions Answered

scotsman ice maker troubleshooting

1. Scotsman Ice Maker is Not Making Ice

Your Scotsman ice maker not making ice? You are not alone. It happens to the best of us, that our Scotsman ice machine not making ice And it is no biggie. Here are some tips for troubleshooting your ice maker so you can be back in business in no time

First, check the room’s ambient temperature where your ice maker is located. If it’s at or below 55 degrees Fahrenheit, no ice will be made—so if your room is too hot or too cold, that might be why your ice maker isn’t working. 

The second possibility is that the water you’re using is too hot or too cold. The ideal temperature range for making ice cubes with an icemaker is between 48-50 degrees Fahrenheit, and you can adjust this setting by looking at your machine’s manual.

Once you’ve taken care of that, make sure that your water supply line is open and that there are no leaks around the outside of the appliance. 

If none of these steps works for you, try removing the bin and cleaning out any water that may have accumulated in the machine itself. This can often fix a “Bin Full” indicator. 

Finally, look at the condenser (the part on top) and make sure that it isn’t covered in dust—over time, dust can build upon this component and make it less efficient at cooling down and producing ice cubes.

2. Scotsman Ice maker is Making Noise 

The Scotsman ice maker is making noise, and you may be wondering what the cause of this is. The good news is that it’s usually a simple fix. 

Vibrations -The first thing to check is whether or not any of the blades on the fan are bent or worn down. If so, they’ll need to be replaced by a technician. If not, check the compressor bolts or mounting screws on the panels. Those might need tightening too! If neither is the problem, see if the water pump has worn out bearings. If it does, it’ll need replacing by a technician.

Grinding – If your machine makes a grinding sound, it’s likely because of buildup in the waterline and surrounding area. Try cleaning out any dirt or scale buildup around your unit and see if that helps resolve things. If not, call an authorized Scotsman technician, and they’ll be happy to help!

Squealing – If it’s a high-pitched squeal, the motor pump could have tight or dry bearings. Lubricating the bearing should help eliminate the sound.

Rattling- Rattling noises could be caused by a few factors. First, check to see if there are any loose screws on the back panel and tighten them. If that doesn’t help, one of the pump’s fan blades could be damaged, causing a loud noise.

3. Mold found in Scotsman Ice maker 

Mold can grow in an ice machine if the machine is in an unsuitable environment for mold growth or if it isn’t cleaned correctly. If your bin has mold, it’s important to prevent further contamination quickly.

  1. You should first clean out the ice bin. If necessary, you can use a soft brush to remove any debris from the inside of your machine. Then wipe down all surfaces of the unit with a sanitizing solution. You should also run hot water through the dispenser for several minutes to ensure that all surfaces are thoroughly washed.
  1.  Consider moving the unit away from high-moisture areas. This includes prep stations that handle large amounts of dough or yeast, which thrive in moist environments (and may encourage mold growth).

4. Scotsman Ice maker Freezes 

If your ice machine freezes, the most important thing to do is to call a plumber. Freezing can damage the evaporator plate irreparably, and if the machine isn’t repaired quickly and correctly, it could be costly.

There are a few steps you can take to prevent freezing:

  1.  Clean it regularly with a descaler. If the water from your home is complex or has mineral buildup, this could damage your evaporator plate and cause freezing issues. Make sure to use a descaler explicitly made for use on ice machines!
  1. Look for frozen water lines! This happens in extremely cold regions or during winter months—and if they’re not dealt with quickly enough, they can cause severe damage to your appliance! Call a plumber right away if you notice this happening!
  1.  Obstructed waterline- The most common cause of freezing ice is an obstructed waterline. This can happen when there is a scale or mineral buildup in the lines, making it difficult for water to flow freely and efficiently through them. The next time you notice that your ice maker is freezing, check your waterlines for scale or mineral buildup instead of making ice!

5. Outside and Inside leak in Scotsman Ice maker 

Leaks on the outside of your ice maker are a big problem. Not only are they a sign of potential damage and repair costs, but they can also cause water damage if left unchecked.

If you’re seeing leaks on the outside of your ice maker, there’s no need to panic—but it is essential to take immediate action!

If your Scotsman ice machine is leaking outside the unit, consider these possible causes.

First, make sure to unplug your machine before inspecting for any potential safety hazards or electrical injury.

The most common cause of leaks outside a Scotsman ice machine is plumbing issues—To fix this problem, inspect the unit to determine where the leak is coming from. Here’s a guide I wrote for fixing ice maker leaks when they fill up water.

Check your shutoff valve: if it’s at fault for your leak, try to contain it and call a plumber to rectify it—but avoid water damage!

Drain obstructions, Check inside your machine and make sure there isn’t anything blocking its drains

Inspect your waterline as well. If either of these parts is at fault for your leak, you’ll need to call a plumber to get them working back up to standard again—and hopefully avoid future leaks!

Deep clean, After you’ve inspected your machine for any visible signs of damage, consider deep cleaning it to ensure there aren’t any other buildup issues.

Internal leaks are prevalent in ice machines and can occur just as frequently within the unit as outside. On the other hand, a technician should most likely address inner leakage. Inspect the machine carefully to locate the cause of the leak and, if required, call your expert for a tune-up.

Scotsman Ice maker Repair 

When your ice machine goes out, it can be a headache to get it back up and running.

But you don’t have to deal with the stress and hassle on your own. Kimball Appliance Parts & Service offers a crew of professionals qualified to provide skilled troubleshooting and repair of all Scotsman appliances in Salt Lake City and the neighbouring regions of northern Utah. We can promptly diagnose the issue and perform the required repairs to get you back up and running. Our price is reasonable and straightforward, with no hidden fees or levies.

The simplest and most effective way to troubleshoot your ice maker is to hire a professional.

Related Reads:

How to Reboot your Scotsman Ice maker 

Whether your Scotsman ice maker has stopped making ice or the cubes aren’t as good as they used to be, you can do an easy thing to reboot it and get back on track.

  • Look for the control panel and red button. The control panel is usually on top of or near the door on your unit, and the red button should be located somewhere on that panel. 
  • Press down and release the button to power down the machine. All of its indicator lights should go out at this point.
  • Locate and press the green button. You should find this button right next to where you pressed down on the red button before—it should be in the same area of your unit’s control panel. 
  • Hold down on it for a second before releasing it to start up the machine again!

Conclusion 

Scotsman is proud to offer some of the most durable and reliable ice makers on the market, and The ice maker is designed with durability and longevity in mind. Their stainless steel construction is meant to withstand wear and tear, and they are built with metal gears that make them operate smoothly and silently.—However, like with any machinery, it might stop working sometimes and take some effort to get things back in order.Luckily, our machines are designed to be easy to repair and maintain, so you don’t have to worry about being without your favourite cold beverages for long.

If you run into trouble with your Scotsman appliance, it’s always best to first consult the Scotsman ice machine troubleshooting manual. If that doesn’t work, give them a call!

The brand is known to have good customer support and

Posted on Leave a comment

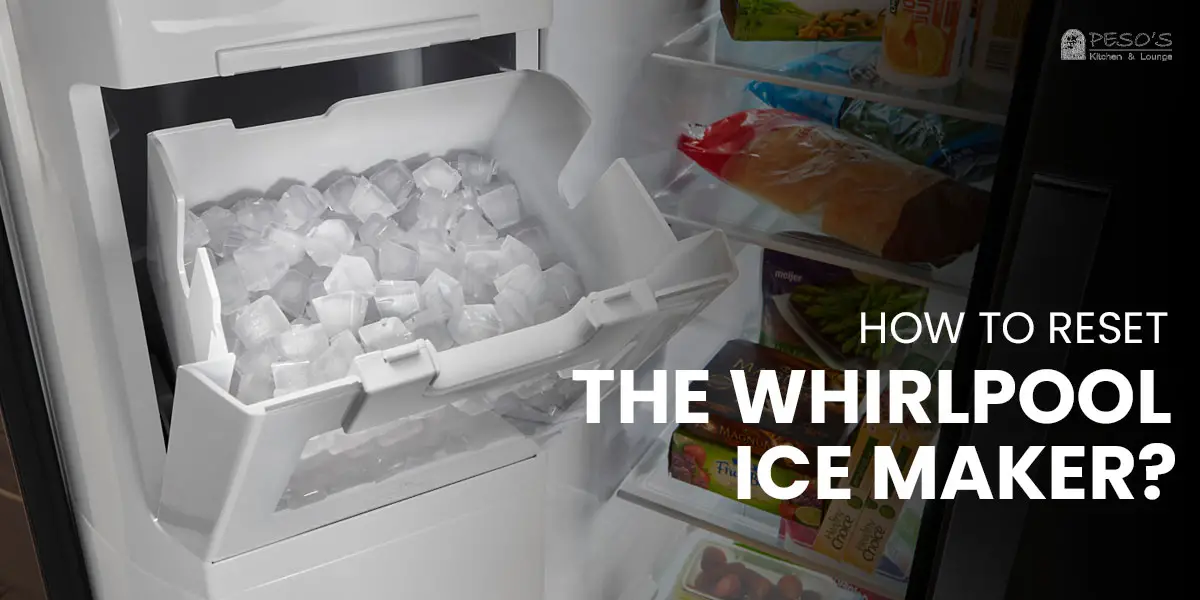
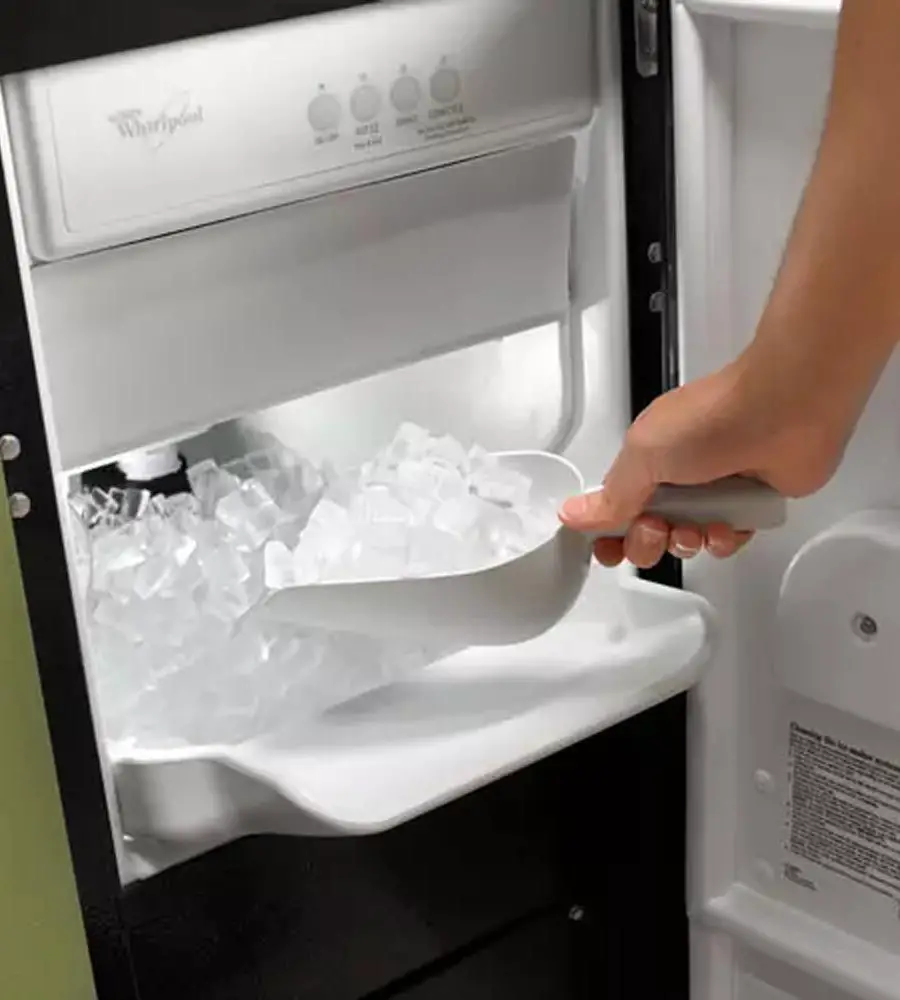
How To Reset The Whirlpool Ice Maker? | Complete Reset Guide 

How To Reset The Whirlpool Ice Maker

How To Reset The Whirlpool Ice Maker?

Welcome to our Complete Reset Guide on how to reset a Whirlpool Ice Maker! In this guide, we’ll provide step-by-step instructions on how to properly reset your Whirlpool ice maker. We’ll also provide troubleshooting tips and tricks to help you identify and solve any potential issues with your ice maker. By the end of this guide, you’ll be able to easily reset your Whirlpool ice maker and keep it running smoothly. So let’s get started!

Need of Resetting the Whirlpool Ice Maker

Resetting a Whirlpool ice maker is necessary to reset the ice-making cycle after a power outage or if the ice maker has been moved to a new location. Resetting the ice maker will also help to troubleshoot any issues that may be causing the ice maker to malfunction. Additionally, resetting the ice maker will help to ensure that the ice maker is operating properly.

Methods on How To Reset The Whirlpool Ice Maker?

1. Find and Press the reset button 

The location of the reset button on a Whirlpool ice maker can vary depending on the model. Generally, it is located on the front of the ice maker, usually on the lower right side. It is a small, red button that is recessed into the ice maker. It may be labeled “Reset,” “Reset Button,” or “Power.”

Resetting the ice maker can fix issues such as the ice maker not producing ice, the ice maker overflowing, or the ice maker not cycling. Resetting the ice maker allows it to go through a full cycle and hopefully fix the issue.

2. Press the ON/OFF Switch 

Depending on the model of your Whirlpool ice maker, the ON/OFF switch is usually located on the front or side of the unit. It is usually a small switch that you can press to turn the ice maker on or off. Depending on the issue you are having with the ice maker, turning the ice maker off and then back on can help to reset and fix any problems.

3. Adjust the Feeler Arm Of the Ice Maker 

To adjust the feeler arm of your Whirlpool ice maker, first, locate the arm on the side of the ice maker. If the arm is too low, you will need to turn the screw on the side of the arm clockwise to raise it slightly. If the arm is too high, turn the screw counterclockwise to lower it. Once you have adjusted the arm, run a cycle of ice and check the cubes to see if they are the correct size. If they are not, continue to adjust the arm until the desired size is achieved.

READ ALSO: Ice Maker Arm Stuck? Here’s 5 Tips to Free It

4. Unplug the Ice Maker 

  • Unplug the refrigerator from the power outlet. 
  • Locate the ice maker in the refrigerator. 
  • Using a flathead screwdriver, loosen the screws that hold the ice maker in place. 
  • Carefully pull the ice maker out of the freezer. 
  • Disconnect the wiring harness that is attached to the ice maker.
  • Take the ice maker out of the refrigerator and place it in a safe location. 
  • Inspect the ice maker for any signs of damage. 
  • Clean the ice maker with a soft cloth and warm, soapy water. 
  • Check all connections and wiring for any damage.
  • Reinstall the ice maker and reconnect the wiring harness. 
  • Secure the ice maker with the screws. 
  • Plug the refrigerator back into the power outlet.

What to do if the Whirlpool Ice Maker is not Working After The Reset? 

resetting whirlpool ice makerHow To Reset The Whirlpool Ice Maker?

If your Whirlpool ice maker is not working after a reset, there are a few steps you can take to troubleshoot and diagnose the problem. 

  • Check the power source: Make sure that your ice maker is connected to a functioning power source and that the power cord is securely plugged into the wall outlet. 
  • Check the water line: Ensure that the water line is connected to the ice maker and that there is water flow to the unit. 
  • Check the ice maker’s temperature: If the temperature is too low, it can prevent the ice maker from working properly.
  • Check the ice maker’s water filter: If the water filter is clogged or blocked, it can prevent the ice maker from working properly. 
  • Check the ice maker’s control board: If the control board is defective, it can prevent the ice maker from working properly. If none of these steps fixes the problem, you may need to contact a professional appliance repair service to diagnose and repair the ice maker.

Key Takeaway

1. Resetting a Whirlpool ice maker can fix issues such as the ice maker not producing ice, the ice maker overflowing, or the ice maker not cycling.
2. To reset a Whirlpool ice maker, find and press the reset button, press the ON/OFF switch, or unplug the ice maker.
3. If your Whirlpool ice maker is not working after a reset, check the power source, water line, ice maker’s temperature, water filter, and control board.
4. If you are unable to fix the problem yourself, contact a professional appliance repair service.

 Conclusion 

This article has provided a comprehensive guide on how to reset the Whirlpool Ice Maker. We have discussed the most common issues and solutions, including what to do when the ice maker won’t reset, how to reset the ice maker manually, and how to check the ice maker’s water supply.

Hopefully, this guide has given you the information and confidence you need to successfully reset your Whirlpool Ice Maker. Apart from this whirlpool ice maker resetting guide, you can also check out how to easily reset igloo ice maker. That is if you own a igloo ice maker at home.

Posted on 3 Comments

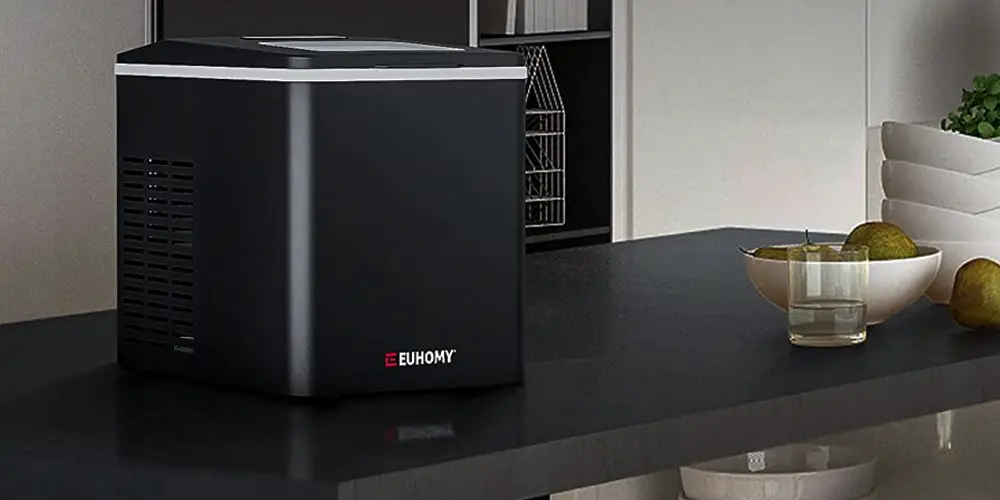
Euhomy Ice Maker Troubleshooting | Fix Euhomy Ice Maker Not Making Ice

Euhomy Ice Maker Troubleshooting

Euhomy Ice Maker Troubleshooting

Ice makers come in different shapes and sizes. While some are portable, some are heavy yet equipped with multiple functions to make your job easier. Euhomy ice makers are more often than not, bullet style ice makers with some recent models classifying as crunchy/nugget ice makers.

Euhomy is well known for delivering countertop and portable ice makers that come in handy for any occasion. However, the product has had its fair share of problems. Several users who have got their hands on the euhomy ice maker have complained about their euhomy ice maker not making ice. If you too are suffering from this problem, then this article is for you.

If you, too have reported your euhomy ice maker not making ice, then we have laid down this quick troubleshooting guide to help you fix the problem.

Our top Ice Maker Picks – Compared

ImageProductFeaturesPrice
GE Profile Opal Countertop Nugget Ice Maker GE Profile Opal Countertop Nugget Ice Maker
  • Makes Chewable sonic ice 
  • 24 pounds per day output 
  • Bluetooth Connectivity 
  • Smart Error Indicators 
9.6
Check Price
Scotsman CU50GA Undercounter Ice Maker Scotsman CU50GA Undercounter Ice Maker
  • Slow Melting Uniquely Shaped Ice 
  • Up to 64 lbs. of gourmet ice in 24 hours
  • Hard water Sensor 
  • User Friendly Control Panel 
9.5
Check Price
Euhomy IM-F Countertop Ice Maker Machine Euhomy IM-F Countertop Ice Maker Machine
  • Automatic Cleaning Function 
  • 40 pounds per day output 
  • Quiet Operation 
  • User Friendly Design 
9.3
Check Price
Ice-O-Matic GEMU090 Air Cooled Undercounter Nugget Ice Machine Ice-O-Matic GEMU090 Air Cooled Undercounter Nugget Ice Machine
  • Unique pearl ice 
  • Quiet Operation 
  • Makes up to 85 lbs. of ice per day 
  • Compact design for under counter installation 
9
Check Price
Euhomy IM-01 Portable Nugget Ice Maker Euhomy IM-01 Portable Nugget Ice Maker
  • Compact design ideal for countertop usage 
  • Virtually noise free operation 
  • Bullet type chewable Ice 
  • User Friendly Design 
8.2
Check Price

About Euhomy Ice Makers: A Brief Overview

Euhomy Ice Makers

As we mentioned earlier, you will be surprised at the number of manufacturers there are when you set out to buy an ice maker. One such popular name is Euhomy.

Over the years, the company has been known for delivering some of the best countertops and portable ice makers. This ice maker features a total storage capacity of up to 2.2 lbs and is known for a daily ice output of up to 40 lbs. So, this is the perfect companion to have, especially if there is a minibar present in your home.

Weighing at just 25 pounds, Euhomy ice makers are completely portable. Right from your house’s kitchen to a party in the garden, you can move this ice maker anytime, anywhere effortlessly. One of the key benefits of this machine is that it comes with a self-cleaning mechanism, meaning you needn’t go through the trouble of cleaning this machine after every use. You can check our detailed guide to know about how to clean portable ice maker.

Steps to Reset Your Euhomy Ice Maker

Although Euhomy is a well-known and trusted brand within the appliance industry among other giants like Tramontina and Igloo, it also has some issues. One of the most commonly reported issues is the euhomy ice maker not making ice. Therefore, your best bet here will be to reset the machine altogether and start afresh.

To reset your euhomy ice maker, trace the given steps

  1. Unplug the ice maker from the primary power socket
  2. Drain the water from the reservoir tank completely
  3. Open the ice maker lid
  4. Completely empty the ice maker basket
  5. Use a soft cloth to clean the metal tubes present within the machine
  6. Once done, close the lid.
  7. Plug in the ice maker back into the water socket
  8. Turn on the machine
  9. Press and hold the power button of your Euhomy Ice Maker for at least 20 seconds
  10. Let the machine rest for another 30 minutes
  11. Turn on the machine to check if the issue is dealt with

Tracing the above-given steps will reset your ice maker and is likely to resolve the issue. However, if you still find your euhomy ice maker not making ice, you can opt to implement the below-mentioned troubleshooting tips.

Euhomy Ice Maker Troubleshooting

Right from your home ice maker not making ice to the ice being stuck within the machine, we have laid down some easy troubleshooting tips to tackle this issue. With these troubleshooting tips at your hand, you needn’t go through the hassle of calling in a technician every time your machine runs into a problem.

1. Euhomy Ice Maker Not Turning ON

This is one of the commonly reported scenarios. If your Euhomy ice maker won’t turn ON, then you ought to check for the following things

  • Faulty Power Socket
  • No Power Supply To the Ice Maker
  • Check to see if you have accidentally switched off the ice maker
  • Damage to the ice maker’s power cord

So, the best way to fix your Euhomy Ice Maker Not turning On is to firstly check for the above causes. If your machine doesn’t work despite the switch being turned on, then you can attach your mobile charger to the socket to verify if the socket is working or not. Next, check for damages to the chord. If you find the power cord damaged, it is probably the reason why there is not enough power supply reaching the ice maker. Replace the cord at once

2. Euhomy Ice Maker Not Making Ice

If your machine doesn’t do the one job you purchased it for, that can be frustrating. But if you find your Ice Machine Not Making ice, check to see if

  • The maker bin is full
  • The water reservoir is empty
  • Waterline to the ice maker is clogged
  • There is any damage to the sensor

If the bin is full, simply transfer the ice from the bin into your freezer. Next, fill in the water reservoir if it’s empty. If the water line is clogged, you can easily clean it using lemon and vinegar. Any damage or issues to the sensor will need you to get it checked it by a technician.

3. Euhomy Ice Maker Not Ejecting Ice

The majority of the time, you will be able to hear the process of ice formation taking within the machine. However, when you take the bin out, you find it empty. If your ice maker stops ejecting ice, it could be because of a reserved refrigeration cycle. To tackle this issue, you will need to clean the tubes present within the machine with lemon water and vinegar. This will remove the corrosion (if any) and take care of the problem.

Additional Tips to Maintain Euhomy Ice Maker in Good Working Condition

If you want to save yourself from the hassle of going through all fixes to tackle issues within your Euhomy ice Maker, you will need to follow these additional tips to maintain your euhomy ice maker and keep it in a good working condition.

  1. Subject your ice machine to routine inspection. This way, you can keep track of slime, mold, debris, or corrosion occurring within the machine. If you notice any of this, you can use a towel dipped in sanitizer to wipe the slime, whereas lemon water and vinegar will easily wipe off the corrosion.
  2. Use a flashlight to investigate the dim areas of your ice machine. This way, you can keep track of any developments around the ice chute.
  3. Increase your cleaning frequency, and don’t wait until you start seeing sights of slime, mold, or corrosion appearing on your machine. This will ensure your ice maker keeps making clear ice if a clear ice maker is what you own.
  4. Keep replacing the water in the reservoir at periodic intervals.
  5. Change the filter from time to time to ensure that your machine only delivers quality ice.
  6. Deal with clogs the minute they appear
  7. Ensure that your ice machine has proper ventilation around it to function

Read my Other Troubleshooting Guides here:

The Bottom Line

As we mentioned, having a few troubleshooting tips at hand saves you from the hassle of calling in a technician every time you run into trouble. We hope our article was helpful enough to take care of your problems. Feel free to let us know your feedback in the comments section below!

Posted on Leave a comment

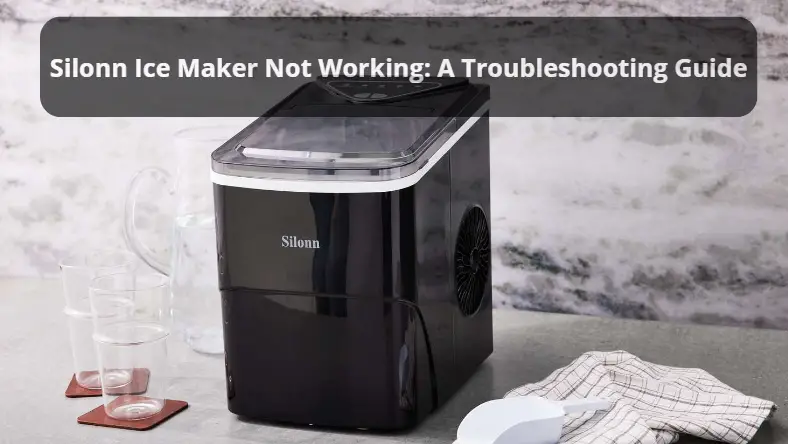
Silonn Ice Maker Not Working: A Troubleshooting Guide

Silonn Ice Maker Not Working: A Troubleshooting Guide

Silonn Ice Maker Not Working

Life without ice on demand is just a little less cool, isn’t it? You’ve probably become accustomed to the convenience of your Silonn ice maker, so when it suddenly stops working, it’s not just an inconvenience; it’s a minor household crisis! But before you melt down, let’s chill out and diagnose the problem step by step. In this article, we’re going to run through some common issues and fixes so you can get your Silonn ice maker back into the frosty business it does best.

Initial Diagnosis

First things first, make sure your device is plugged in and your power source is working correctly. Is there any sign of life from the LED indicators or any noise that would suggest it’s working?

Silonn Ice Maker Not Working

Possible Causes

  • Lack of Power

Ensure that the ice maker is properly plugged in and that the outlet is functional. Have you tried using the same outlet for another appliance?

  • Water Supply Issues

Is there water in the reservoir? It might sound obvious, but sometimes the simplest answer is the correct one!

  • Freezing Issues

Now, this may sound ironic, but could it be too cold? Sometimes ice makers fail to work properly because the freezing element is coated in frost.

  • Sensor Malfunctions

These clever machines rely on sensors to know when to make ice. If a sensor is playing up, your ice maker might be getting mixed messages.

  • Faulty Components

Occasionally, the problem can be down to a faulty motor, a kink in the water line, or even a stubbornly jammed ice tray.

Quick Fixes

  • Reset Your Silonn Ice Maker

Much like the age-old ‘turn it off and on again’ trick, a quick reset can work wonders. Have you tried unplugging it for a few minutes?

  • Inspect and Adjust the Water Supply

Make sure water lines are connected securely and aren’t pinched or frozen – ice makers can’t work without a steady flow of water!

  • Clean and Maintain

A clean machine is a happy machine. Regular cleaning can prevent a host of issues caused by lime and scale buildup.

  • When to Call a Professional

If you’ve run through all the basic checks and fixes with no joy, it might be time to call in the cavalry.

Maintaining Your Silonn Ice Maker

  • Regular Cleaning Schedule

A routine deep clean once in a while can keep your ice maker in tip-top condition. Do you remember the last time you cleaned it?

  • Replacing Filters

Just like with your water, clean filters mean clean ice. Are your filters past their prime?

  • Proper Installation and Positioning

Make sure your ice maker is on a flat surface and sufficiently ventilated. These factors can affect its performance.

Preventative Measures

  • Regular Inspections

A quick check-up now and then can prevent ice maker tantrums. It’s all about spotting the small issues before they turn into big ones.

  • Avoid Power Surges

Protect your ice maker from power surges with surge protectors, just like you would with your other precious electronics.

  • Maintain Ambient Temperature

Ice makers work best within certain temperature ranges, so consider the climate around your unit. Is it perhaps too warm in its current location?

silonn ice maker fan not working

Troubleshooting Tips

  • Reference Your Silonn Manual

Your manual is packed with tailored advice. That little book might just hold the key to your icy dilemma.

  • Check the Warranty

Is your ice maker still under warranty? Sometimes, the best solution is to return it to the pros for repair or replacement.

Final Thoughts

Wonky water supply, a filter fiasco, or a sensory snafu? Whatever the problem, I hope this guide has set you on a cool path to a working Silonn ice maker. Stay frosty and remember: regular maintenance can often prevent these little bumps in the road to ice nirvana.

FAQs

Why did my Silonn ice maer suddenly stop working?

It could be due to a variety of reasons such as power supply issues, a clogged water filter, or a technical fault within the machine.

How do I reset my Silonn ice maker?

Typically, you can reset an ice maker by unplugging it for a few minutes and then plugging it back in. Check the user manual for model-specific instructions.
What routine maintenance does my Silonn ice maker require?

Regular cleaning to prevent scale buildup, changing filters as needed, and ensuring proper air circulation are all key parts of maintaining your ice maker.

Can a power surge damage my Silonn ice maker?

Absolutely, like any electrical appliance, your ice maker can be damaged by a power surge. A surge protector is a wise investment to protect your appliance.

If my Silonn ice maker is under warranty, should I attempt to fix it myself?

It’s best not to meddle with the device if it’s under warranty, as doing so may void the warranty. Contact Silonn or the retailer for the best course of action.

READ ALSO: Off Grid Freezer: Instruction, Types, pros and cons in 2024

Posted on Leave a comment

Do popsicles expire? 10 signs

Do popsicles expire?

Do popsicles expire?

Popsicles are those delightful frozen treats that bring a rush of sweet, cool refreshment on a scorching summer day. But have you ever wondered if popsicles expire? Can you still enjoy that popsicle that has been sitting in your freezer for an extended period? In this article, we’ll explore the shelf life of popsicles, factors that affect their expiration, signs of spoilage, proper storage techniques, how to extend their lifespan, and answer some frequently asked questions about popsicle expiration.

Introduction

Before we delve into the intricacies of popsicle expiration, let’s first define what popsicles are. Popsicles, also known as ice pops or ice lollies, are frozen desserts made by freezing flavored liquid around a stick. They come in various flavors and forms, from fruit-based options to creamy delights and even novelty shapes. Popsicles have gained immense popularity over the years, especially during hot summer months when they offer a tantalizing respite from the heat.
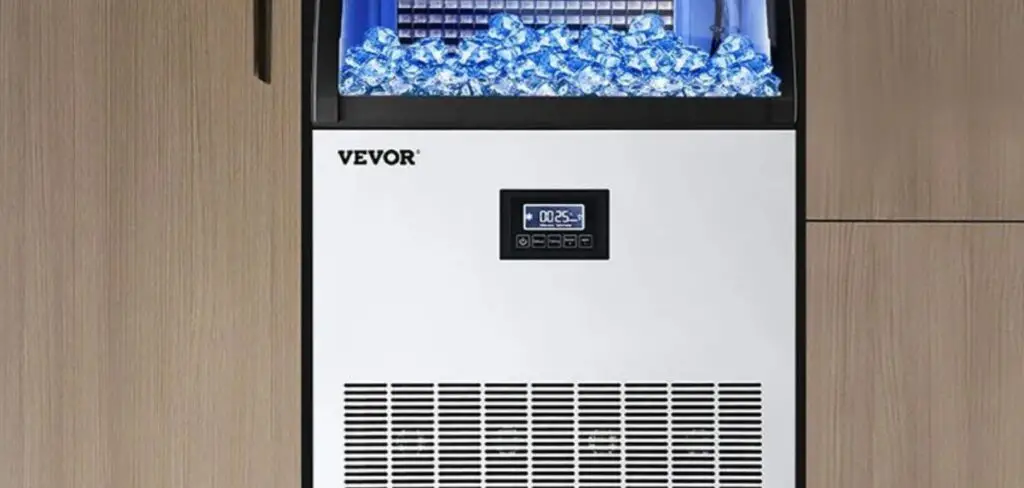
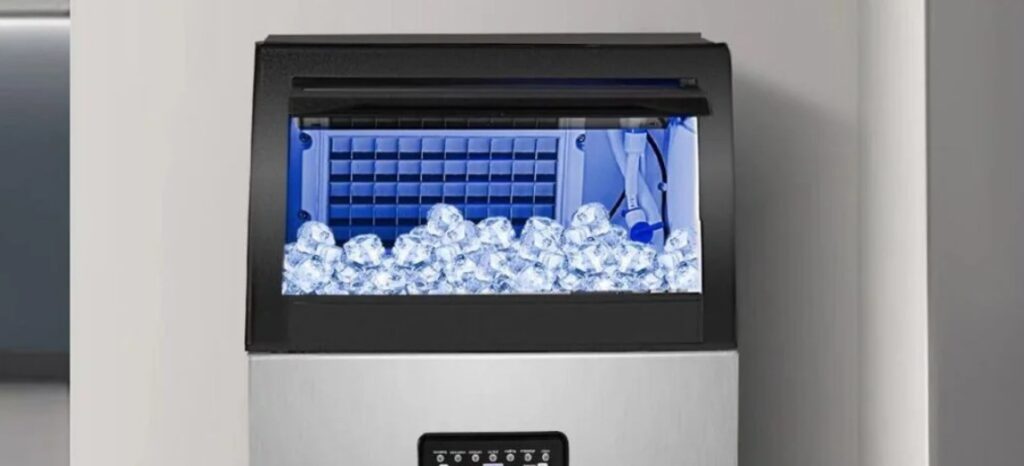
Do popsicles expire?
Image source: Quora

The Shelf Life of Popsicles

Every consumable item has a specific shelf life, including popsicles. Shelf life is the period during which a product retains its desired quality and remains safe for consumption. When it comes to popsicles, there are a few factors that determine their shelf life.

Freshly made popsicles, those prepared at home from fresh ingredients and frozen immediately, generally have a shorter shelf life compared to their commercially packaged counterparts. Packaged popsicles undergo specific preservation techniques to enhance their longevity and maintain their taste and texture.

Factors Affecting Popsicle Shelf Life

Several factors play a role in determining the shelf life of popsicles:

Ingredients

The quality of ingredients used in popsicles influences their shelf life. Natural fruit popsicles, for example, may have a shorter shelf life due to the perishability of fresh fruits. On the other hand, popsicles made with artificial flavors and preservatives last longer.

Preservation Techniques

Commercially produced popsicles often undergo preservation techniques, such as flash freezing or adding stabilizers and emulsifiers to prevent the growth of microorganisms and inhibit freezer burn. These techniques help extend the shelf life of the product.

Temperature and Storage Conditions

The temperature at which popsicles are stored also affects their shelf life. Freezing them at temperatures below 0°F (-18°C) helps maintain their quality and texture. Additionally, exposure to air, temperature fluctuations, and improper sealing can cause quality deterioration and shorten their shelf life.

do pedialyte popsicles expire
Image source: Forking Up

Signs of Expired Popsicles

While popsicles do not technically “expire” in the same way perishable food items do, they can go bad over time. Here are some signs to look out for to determine if a popsicle has gone past its prime:

Texture Changes

An expired popsicle may become overly soft or develop a mealy texture. Ice crystals may form, indicative of freezer burn. The texture alteration can make the popsicle less enjoyable to consume.

Color Changes

Colors may fade or change on an expired popsicle. The vibrant hues of the original popsicle may become dull or even separate, indicating a loss of quality.

Off-putting Odors

Spoiled popsicles might emit unusual odors. If you notice a foul or off-putting smell from a popsicle, it is best to err on the side of caution and discard it.

Taste Alterations

One of the most apparent signs of an expired popsicle is a change in taste. As the popsicle surpasses its shelf life, the flavors can degrade, taste artificial, or simply lose their appeal.

Proper Storage Techniques for Popsicles

To ensure your popsicles stay fresh for as long as possible, it’s essential to store them properly. Here are some tips for optimal storage:

Freezer Temperature

Maintain a freezer temperature below 0°F (-18°C) to keep your popsicles in the best condition possible. Avoid temperature fluctuations, as they can negatively impact the texture and taste.

Packaging

If you’re making homemade popsicles, use freezer-safe and airtight containers to prevent them from absorbing unwanted freezer odors and prevent freezer burn. For commercially packaged popsicles, make sure the packaging is intact before purchasing.

Avoiding Exposure to Air

Seal the popsicles tightly with their original wrappers or resealable freezer bags to minimize air exposure. Air exposure can lead to ice crystals forming, which affects the popsicle’s texture and taste over time.

Extending the Lifespan of Popsicles

If you want to extend the lifespan of your popsicles, here are some additional measures you can take:

Repackaging

When storing homemade popsicles, consider individually wrapping them with plastic wrap or using popsicle molds with built-in covers. These measures can help protect the popsicles further and minimize freezer burn.

how do you know if popsicles are expired
Image source: Food Plus Words

Using Proper Containers

Invest in high-quality popsicle molds or containers that are specifically designed for freezing. These containers offer optimal protection and prevent cross-contamination from other freezer items.

Regular Freezer Maintenance

Maintaining a clean and well-organized freezer is crucial for extending the lifespan of your popsicles. Regularly remove any ice buildup, properly label containers, and rotate popsicles to ensure you consume the oldest ones first.

READ MORE: Ice Machine Rental: Is it worth it?

Frequently Asked Questions About Popsicle Expiration

Can I eat a popsicle even if it’s past its expiration date?

While an expired popsicle is not likely to cause harm, it may not taste as good or have the desired texture. It’s best to discard it and enjoy a fresh popsicle instead.

Can I freeze melted popsicles?

Yes, you can! If your popsicles have melted, you can refreeze them without any issues. However, be aware that refreezing may affect the overall texture and quality of the popsicle.

Can I refreeze a thawed popsicle?

It is generally safe to refreeze a thawed popsicle, but the quality may suffer. The texture and taste may change, so it’s advisable to consume it immediately or discard it.

Can I still enjoy a slightly freezer-burned popsicle?

While a slightly freezer-burned popsicle is not harmful, the texture may be affected, resulting in a less enjoyable experience. If the freezer burn is significant, it’s best to discard the popsicle.

Conclusion

In conclusion, popsicles do have a shelf life, although they may not technically “expire” like other perishable foods. By understanding the factors affecting their shelf life, the signs of spoilage, and implementing suitable storage techniques, you can enjoy your popsicles for a longer period. Remember to always check for any changes in texture, color, odor, or taste before consuming a popsicle. Stay cool and indulge in the icy delight of popsicles, even on the hottest summer days!